First, learning how to pan for fine gold is one of the most rewarding activities you can add to an RV camping trip. Whether you are boondocking in Arizona, exploring California Gold Country, or traveling to Alaska, microscopic flour gold hides in hundreds of western creeks. However, without the right technique, fine gold flakes can easily wash or float right out of your pan.
At Hitched4fun.com, we have tested our gold prospecting gear from desert washes to mountain rivers. Below, follow our simple 5-step guide on how to pan for fine gold without losing a single speck!
Why Learning How to Pan for Fine Gold Requires a Different Strategy
First, coarse gold nuggets sink immediately to the bottom of a gold pan. In contrast, fine flour gold consists of tiny, flat flakes that are often smaller than a grain of salt. Because these flakes have high surface area relative to their weight, two things ruin beginner recovery:
- Oversized River Rocks: First, large pebbles rolling inside your pan knock microscopic gold flakes out of the riffles.
- Water Surface Tension: Second, dry flour gold actually floats on top of water like a tiny raft unless you break the surface tension.
5 Steps: How to Pan for Fine Gold Like a Pro
Step 1: Classify Your Gravel Over a 5-Gallon Bucket
First, never pan unclassified river gravel when chasing fine gold. Instead, lock a Gold Buddy Classifier or our 3-piece Classifier Bundle onto a standard 5-gallon bucket. Next, scoop paydirt in with a non-metallic Green Treasure Scoop and shake out all large rocks.
Step 2: Break Water Surface Tension with Gold Magic Drop
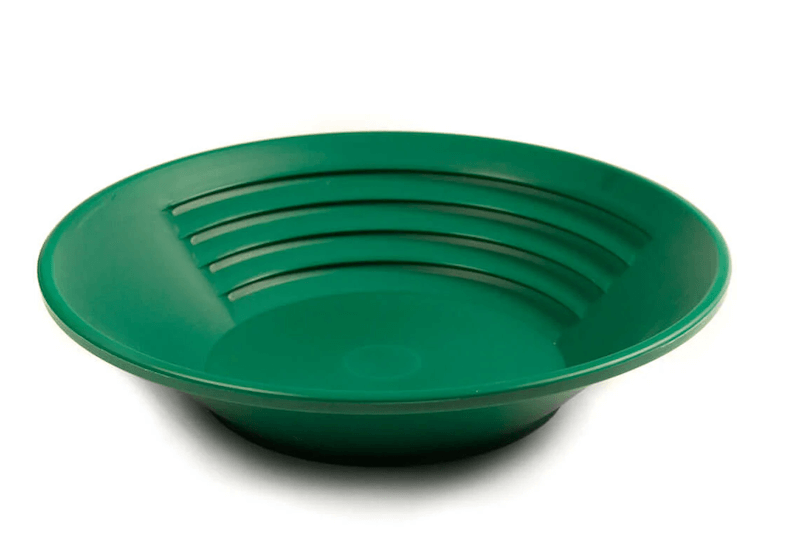
Second, submerge your classified material in a 14″ GPAA Gold Pan or Wet Separation Storage Tub. Immediately add two drops of Gold Magic Drop. Consequently, the wetting agent breaks water surface tension so floating flour gold sinks straight to the bottom.
Step 3: Stratify and Wash Off Light Sand
Third, shake your pan vigorously side to side underwater for 15 seconds. Because gold is roughly 19 times heavier than water, this shaking settles all fine gold against the bottom of your 1849 Gold Pan. Then, tilt the pan forward slightly and let gentle waves wash away the lighter blonde sand until only heavy black sand remains.
Step 4: Remove Magnetic Iron with a Black Sand Magnet
Fourth, heavy black sand (magnetite and hematite) always collects in the bottom of the pan alongside fine gold. To speed up cleanup, swirl your concentrates in a 10-inch finishing pan like our Archer Blue 10″ Gold Pan or Archer Pink 10″ Gold Pan. Next, pass a Gold Magic Black Sand Magnet or 3 LB Black Sand Magnet underwater to pull out magnetic iron.
Step 5: Vacuum Flour Gold with a Snuffer Bottle or Spiral Wheel
Finally, never try to pinch microscopic flour gold with your fingers! Instead, squeeze a 4 oz Snuffer Bottle or Fine Gold Plastic Suction Tweezers to vacuum every flake safely into your glass vial. Or, if you have buckets of heavy black sand concentrates, run them through our automated Gold Magic 12-E Spiral System Kit or GPAA Mini Sluice Concentrator right at your campsite!
⛏️ Pair Your Panning Kit with an Authentic 1892 Yukon Prospector’s Diary!
After panning for fine gold by the creek, relax by the campfire with our family’s true 19th-century pioneer journal! In May 1892—four years before the 1896 Klondike Gold Rush—our 3rd great-grandfather, Thomas R. Bennington, sailed from San Francisco on the City of Topeka, crossed Chilkoot Pass, and voyaged 700 miles down the Yukon River to Fortymile.
Featuring 26 custom Gaia GPS maps, this book is an 🔥 Amazon Top 50 Best Seller. Watch the true story from Before the Klondike: The 1892–1893 Journals of Thomas R. Bennington below:
✍️ Order a Hand-Signed Copy of “Before the Klondike” (Use code KLONDIKESAVER for $10 OFF!)
📦 Or Buy on Amazon (Hardcover, Paperback & Kindle eBook – Affiliate Link)
🗺️ Explore the 1892 Pioneer Trail | 📚 See Top Books Like Klondike Fever
As an Amazon Associate, Hitched4fun earns from qualifying purchases.
Frequently Asked Questions: How to Pan for Fine Gold
1. What is the best mesh size when learning how to pan for fine gold?
First, start with a 1/4-inch or 1/8-inch screen to remove coarse gravel, then step down to a 1/12-inch or finer Gold Buddy Classifier for flour gold.
2. What starter kit do I need for my first RV gold panning trip?
Specifically, we recommend pairing our 14″ GPAA Gold Pan with the GPAA Mini Starter Kit and a 3-year GPAA Membership so you have legal claims to visit nationwide.
3. Where can I watch step-by-step video instructions?
Finally, visit our free Gold Prospecting Video Library to see our pans, classifiers, and Gold Magic spiral wheels in action!